

This article contains affiliate links (including Amazon and UK garden merchant partners). If you choose to make a purchase through these links, I may earn a small commission at no additional cost to you. I only recommend products, tools, and suppliers I personally use and trust on the homestead.
How to Overwinter Water Butts & Outdoor Taps (Preventing Frost Damage)
When autumn draws to a close and the first hard frost settles across the UK, most gardeners instinctively think about protecting sensitive plants, lifting dahlia tubers, or mulching exposed soil beds. However, one of the most vital—and frequently overlooked—tasks on the urban homestead is winterising your outdoor water supply.
Water expands by roughly 9% when it freezes. When trapped inside rigid plastic water butts, brass taps, downpipe diverters, or flexible garden hoses, that expansion exerts immense hydraulic pressure. Without proper winter preparation,you risk split barrels, cracked valves, or burst pipework that leads to expensive leaks come spring thaw.
By taking a few quick preventative steps before freezing weather hits, you can protect your rainwater harvesting system and keep your outdoor plumbing safe all winter long.
1. Disconnect and Store Garden Hoses
Leaving a garden hose attached to an outdoor tap or water butt valve over winter is a recipe for disaster. Any water remaining inside the hose will freeze solid, creating a plug of ice. This forces ice pressure backward directly into the body of the tap or connection joint.
- Step 1: Unscrew all hose connectors, spray guns, and brass fittings.
- Step 2: Fully uncoil the hose on a slight slope to let trapped water drain out completely.
- Step 3: Roll the hose loosely and store it in a dry shed, garage, or undercover workspace away from freezing ground damp.
2. Isolate and Insulate Exposed Outdoor Taps
Your outdoor garden tap is directly connected to your property’s fresh water supply, making it a critical area to protect.
- Isolate the Valve: If your house features an internal isolating valve specifically for the external tap (usually located under the kitchen sink or near the main stopcock), turn it off. Open the outside tap fully to let all remaining water drain away.
- Fit Tap Lagging: If you cannot isolate the indoor supply line, insulate the tap header directly using a molded foam,thermal fabric, or hard-shell outdoor tap cover.
- Insulate Exposed Pipes: Wrap foam pipe lagging around any bare copper or plastic pipe running along external walls, securing the seam joins tightly with waterproof insulation tape.
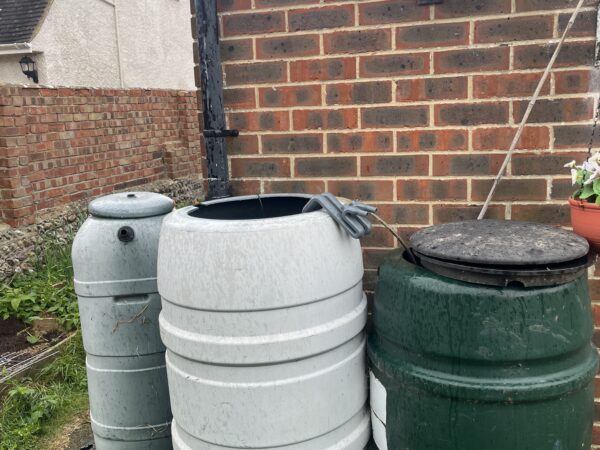
3. Winterising Your Rainwater Butts
A full 200-litre water butt contains substantial thermal mass, but during extended UK cold spells, the water will freeze solid from the top down. As the surface ice sheet thickens, it pushes outward against the plastic walls, splitting seams or cracking bottom drain spigots.
Option A: Drain Fully (Best for Unprotected Plastic)
If your water butt is made from standard thin-walled rigid plastic, draining it before severe freezes is the safest choice:
- Open the lower tap and drain the water into buckets to fill indoor houseplant cans, or direct the water onto established trees or shrubs.
- Disconnect the downpipe diverter hose so fresh roof rainwater doesn’t refill the barrel.
- Leave the bottom tap open so any stray rainwater drains immediately.
Option B: Lower the Level & Add a Expansion Float
If you prefer keeping stored rainwater for early spring use:
- Drain the barrel down to roughly half capacity.
- Disconnect or flip your downpipe diverter to its winter setting (redirecting roof runoff down the storm drain).
- Drop an expansion float into the water butt—such as a partially weighted plastic bottle or a tennis ball. If ice forms inside the barrel, it compresses the floating object first, absorbing the internal pressure before it pushes against the plastic barrel walls.
4. Protect Downpipe Diverters and Taps
Water butt taps and rubber downpipe diverter units are easily damaged by ground frost:
- Elevate the Barrel: Ensure your water butt sits on a level, sturdy stand rather than directly on freezing bare earth.Elevating the unit protects the base structure and makes filling watering cans significantly easier.
- Clean Out Debris: Scoop out accumulated leaf mould and silt from the bottom of the water butt before winter sets in. Silt traps moisture around internal tap seals, accelerating wear and freeze damage.
Homestead Recommended Gear
If you are looking to expand or upgrade your off-grid rainwater harvesting setup ahead of the new growing season,consider choosing high-density, frost-resistant storage options:

Summary Checklist for Autumn
- [ ] Disconnect, drain, and store all garden hoses undercover.
- [ ] Isolate internal supply valves and open external garden taps to clear trapped water.
- [ ] Fit insulated tap covers and pipe lagging to external brass fittings.
- [ ] Empty or lower water levels inside garden water butts.
- [ ] Disconnect downpipe diverter connections to prevent unexpected overflows.
- [ ] Place expansion floats into barrels retained at partial water capacity.
Taking 30 minutes to complete these simple winter maintenance steps ensures your garden water harvesting infrastructure survives winter completely intact, ready to collect clean rainwater for your spring crops!